Sunday, 25 November 2012

My new Jacobite Army and Maurice


In the summer I won an auction on E-bay for 2 English civil War Armies and the seller very kindly sent me an additional free army of Scot Covenanters. I decided to use these for an army to use with the excellent "Maurice" rules by Sam Mustafa and so they became my early eighteenth century Jacobite Army. 
In Maurice your Army is made of units adding up to a 100 points, There has been quite a bit of discussion on  the official Maurice forum of how to portray the Jacobites, I decided to make a list as below

Two national cards La baionnette and En Masse 15 points.
 4 highlander units at Elite status 38 points.
  4 Lowlander trained units with 1 base of pikes each 24 points .
                    1 French Trained Infantry unit. 6 points
                                                    2 Scottish Cavalry Conscript units 8 points
 1 French Cavalry Trained unit 6 points.
 2 Artillery units 3 points.

The thinking behind giving the Highlanders Elite Status was because of their reputation of being argubly the most ferocious fighters in the British Isles and also to counter this I  restricted them to formations of en masse and column. When Researching the Jacobite army they seemed to have very little cavalry, but due to the 3:1 ratio rule in Maurice I decided to give the Scottish cavalry, conscript status and to make the numbers up by having a French trained cavalry unit as well.


                                        My Jacobite Army with My Commander on the right and the Objective marker to the left on the picture.
                                      

          In order to get in the mood in using my new army and for a bit of fun , I borrowed a Kilt from a friend from work, the day before the game. I thought it would be a good idea to see if it fitted ok and so I just put it on and was just asking my wife if my arse looked big in it, when some of my Spanish friends called around to take me to a local bar. With no time to change (the lads are only let out for a hour a week) I made my first public appearance a bit sooner than I had thought. However we had a great night and after a few beers my Spanish improved dramatically although my Scottish accent left a lot to be desired. The problem was I woke up with an almighty hangover and vague memory of organising a Scottish themed fiesta at my house a few days before Christmas.  


Me, complete with Kilt and hangover (observe the narrowing of the eyes), prepared for the battle with dice ready in the Sporran 


We played at Jose's house and I played against his English Army, he won the initiative and decided to defend, so I formed up for attack with my highlanders in the middle in the first line and my low landers on their flank and making up my second line. My cavalry were deployed on my right flank.


Jose drew his army up into two lines as well, with his objective placed automatically in the town.


My cavalry wing were helped by the  notable Michel Georges who gave a +1 attack modifier to my horse.
 
 
My Highlanders began their attack however I had forgot about the rules of which units can move in a force in only the same formation and my lowlander units were left behind.

 
The English elite infantry units leveled their muskets, I used my "fire first" card but with little effect and the English fired with deadly effect.

 
I managed to rally one unit but as soon as I steadied one unit another volley would hit them, my right hand Highland unit broke under the heavy fire.
 
 
Caught in no mans land there was nothing else for it but for my Highlanders to drop their muskets and to charge with a little luck they might  get into close quarter combat.

 
My left hand unit was the only one successful and managed to push the English back.

 
The Highlander charge was finished with all the units broken, An English unit that was  over confident had strayed near to my second fresh line and one of my lowlander units charged and broke it.
 
 
Whilst both side centres halted and reorganised, I saw a chance to unleash my cavalry on his artillery. I charged and managed to take out one of his units. 


                  Jose countercharged with his cavalry an broke my cavalry and I was now only 1 point away from my army morale breaking.


Just a our centres began to engage once again, Jose used a "Death of a hero card"  and my army morale collapsed prematurely thus ending the battle in Joses favor.

Even though I didn't win, I enjoyed the game very much, The main problem I had was against the heavy firepower from the British units with all their rerolls etc, also using the cards more effectively for close combat. Hopefully next game should look more like Prestonpans instead of Culloden.

Friday, 5 October 2012

FOG Napoleonic Tournament Alcoy

 
On the 22nd of September, I took part in our first tournament using the FOG Napoleonic rules. We have been using these as a replacement for the Lasalle rules. However due to the very mixed up way the rules are set out in the book, when we have a game there seems to be more questions unanswered rather than answered. Also I am a native English speaker, so hats off to my Spanish friends for making sense of them better than I can. I have played a few games already but it has been quite sporadic and due to concentrating on My Gettysburg Rules. I still managed to get a sneaky practice match in the night before at my local club against Salvador's Russians.
 
It was an early start the next morning, having to get up at six o'clock to travel to Alcoy. We had 8 players in our tournament, and also there was a small tournament of Napoleon at War being played and another club Estandarte were recreating the Battle of Albuera.
 
 
For this tournament I decided to use my British, I used the BEF to Walcheren army list due to it letting me field 2 British Mixed Divisions. My first opponent was Danny with his French, We rolled for initiative and I was the defender. I managed to select a second road and so was able to place my Line of Communication in a corner.


Danny deploys his French Army on a wide frontage with two units of cavalry on his right flank.


As his centre troops move forward, his cavalry begin their flanking manouvre around the and over the hills. My flank is quite weak to meet this threat with 2 small units of light Infantry and a unit of KGL Hussars.


 Upon seeing the French cavalry come thundering over the hill, both infantry units go into square, and the  KGL Hussars form line to protect my flank and rear. Also Danny unlimbers two artillery batteries to fire on my squares while his cavalry unit waits for their chance.


The KGL Hussars evade to a hill and then countercharge, but the French are too strong and rout them.


The KGL manage to rally behind my reserve infantry unit, but the French are now well and truly behind my lines.


My two squares on my left flank have been finally destroyed and I have to form squares with my centre infantry units to ward of the victorious French Cavalry.


This is the last picture which I took of the game, my KGL attempted once again to charge but were heavily defeated and routed. The remaining British squares with no cavalry support were quite helpless, and  my first game ended in defeat.

Playing Danny in the first game was a bitter sweet experience, it was good because he has a great understanding of the rules and so I learn´t alot, but bad because also he is a very good player.

the score was Danny 22 and myself a miserable 3


My second game was against Jose and his French Guard, again I was the defender but this time I was luckier with the river stretching to my side of the board and it was impassable. Again my line of cummunication was in the corner, but with having a secure right flank next to the river, I was able to strengthen my left flank.


Jose, short of cavalry deployed his force as a battering ram marching straight down the road. I thought I might be able to alleviate the pressure by attacking his unprotected right flank. However due to the rule of the defender not being able to cross the halfway line straight away. He was able to react to the threat.


In the centre Jose's cavalry lead the attack, with my Impetous light Dragoons advancing up the road to meet them.
 
 
Unfortunately my Light Dragons were no match against the Guard cavalry, my infantry had to form square and with the french cavalry threatening my artillery flank on the hill, I had to abandon the guns. Due to having to break for dinner and finishing the game to schedule, I was defeated but only marginally, I put up a better show this time resistance but due to Jose's Guard troops being able to roll 1 or 2's again he had the upper hand. 
 
The score for the second match was Jose 15 and myself 10 so slowly improving. 
 
 
My last game was against Javier and his French army, this time I decided to forget about choosing hills and placed rough and difficult terrain instead. I placed my Light infantry out in front with my line infantry in support and my cavalry protecting my flanks. 
 
 
Javier advanced but found the going slow through the difficult terrain, also my heavy artillery began t take effect on his infantry columns.


With stalemate between our 2 cavalry units on my left flank, his infantry in the centre began to cause a blockage, his troops began to waver, so I began to advance my second line forward.
 
 
My right flank was not faring so well and my light dragoons were once again routed, although Javier's victorius cavalry had been given a bloody nose and needed to reform.
 
 
His cavalry begin to make a nuisance of themselves, but before they could charge it was time to finish the game.
 
The result was 14 to Javier and myself 11
 
The overal results were
 
1. Danny's French Army 51 points

2. Salvador's Russian Army 45 points

3. Sergio's Spanish Army 45 points

4. Juan's Polish Army 42 points

5. Toni's Russian Army 36 points

6. Javiers French Army  32 points

7. Jose's French Army 25 points

8. My British Army holding up the rest with 24 points.
 
The good news is with coming last I had first go in the raffle and won the first prize (I think ).


Picture of the winner Danny in the centre with runners up Salva on his right and Sergio to his left.
 
I have started to get a better understanding of how FOG plays, and for me as in Lasalle it will be a challenge to see if the game can simulate what actually happened with tactics and formations on the napoleonic battlefield. I just need to cut and paste the rulebook into more logical sections.
 
If you would like to see more pictures of the FOG N Tournament or the Napoleon at War tournament or the excellent recreation of the Battle of Albuera please go to  http://jornadasnapoleonicas.blogspot.com.es/p/fotos.html


   Finally thanks to everyone for taking part and special thanks to the organisers who put in a lot of hard work into making the event such a success.

Thursday, 13 September 2012

Gettysburg Day 3 "Picketts Charge"


This  was  the final game of the day, and we were joined by four guys who were interested in trying out the game. Once again we quickly changed the scenery to fight the third day of Gettysburg and the infamous "Pickets charge". Although in the actual battle there were actually more Confederate divisions than Picketts who made the assault, Our standard game is played  on a 4ft by 6ft table with 3 Brigades a side, so we just used Pickett's division against the Union 2nd Corp 2nd Division under  their commander, Gibbon. 


Kiefer, Vincente and Francois were playing the Confederate Brigade commanders and Angel, Luis and myself were the Union Brigade commanders. Usually in the two player game the Division commander is important because he has  to attempt to activate his Brigade commanders. But not wanting players to be sitting around doing nothing if they fail their activation tests, I decided to do away with this  rule.


After a few turns  of the Confederate artillery bombarding the Union positions the Confederate forces on the Union left flank advance quickly over the open ground in column formation.


The Confederate centre and  right flank brigade (Garnets) advance more slowly due to the many fences and begin to take more casaulties.


A Confederate Regiment gets too close to the Union line before deploying and begins to fire. The other Union Regiment countercharges over the wall and routs another Reb unit. 


Due to having to explain the rules and having a great time, unfotunately I didn't take that many
photos. But basically my brigade on the left actually did quite well and managed to repulse the Confederate attack and actually start to counterattack down the hill.

The Union right flank under Angel  who was protecting the Union line of communication started to slowly crumble although right at the end he managed to to repulse an attack that would have mean't the capture of the line of communication and disaster for the whole of the Union army.


Kiefer explaining the skirmish rule to his Confederate comrades, Vincente and Francois

Most important was the Union centre under the leadership of Luis. His right flank was routed but they managed  to rally and repulse the Confederate attack, however the Confederate objective,  the copse of trees was thinly defended with no Union reserves directly behind it. On the last turn the Confederate took the  position and with no Union regiments able to counterattack the Confederates won the day. This made the overall  score 2 - 1 to the Rebs and winning the Battle of Gettysburg, making Kiefer a very happy chappy.
 .
   Our four new friends said they had a great time and really enjoyed the rules and want to play again, so it was well worth all the hard work, and all those late nights making those bloody fences!


Gettysburg Day two "The Wheatfield"

After a quick change over (or it should have been quick but I was reading the map  upside down when we were laying the hills) we were ready to start the next game, "The Wheatfield". I took control of the Union 3rd Corp 1st Division and Kiefer had control of three Confederate brigades from Hood's  Division.


The Battlefield shown from the North's perspective the famous Wheatfield is  top right. The main objective is the Stony Hill in the centre. 


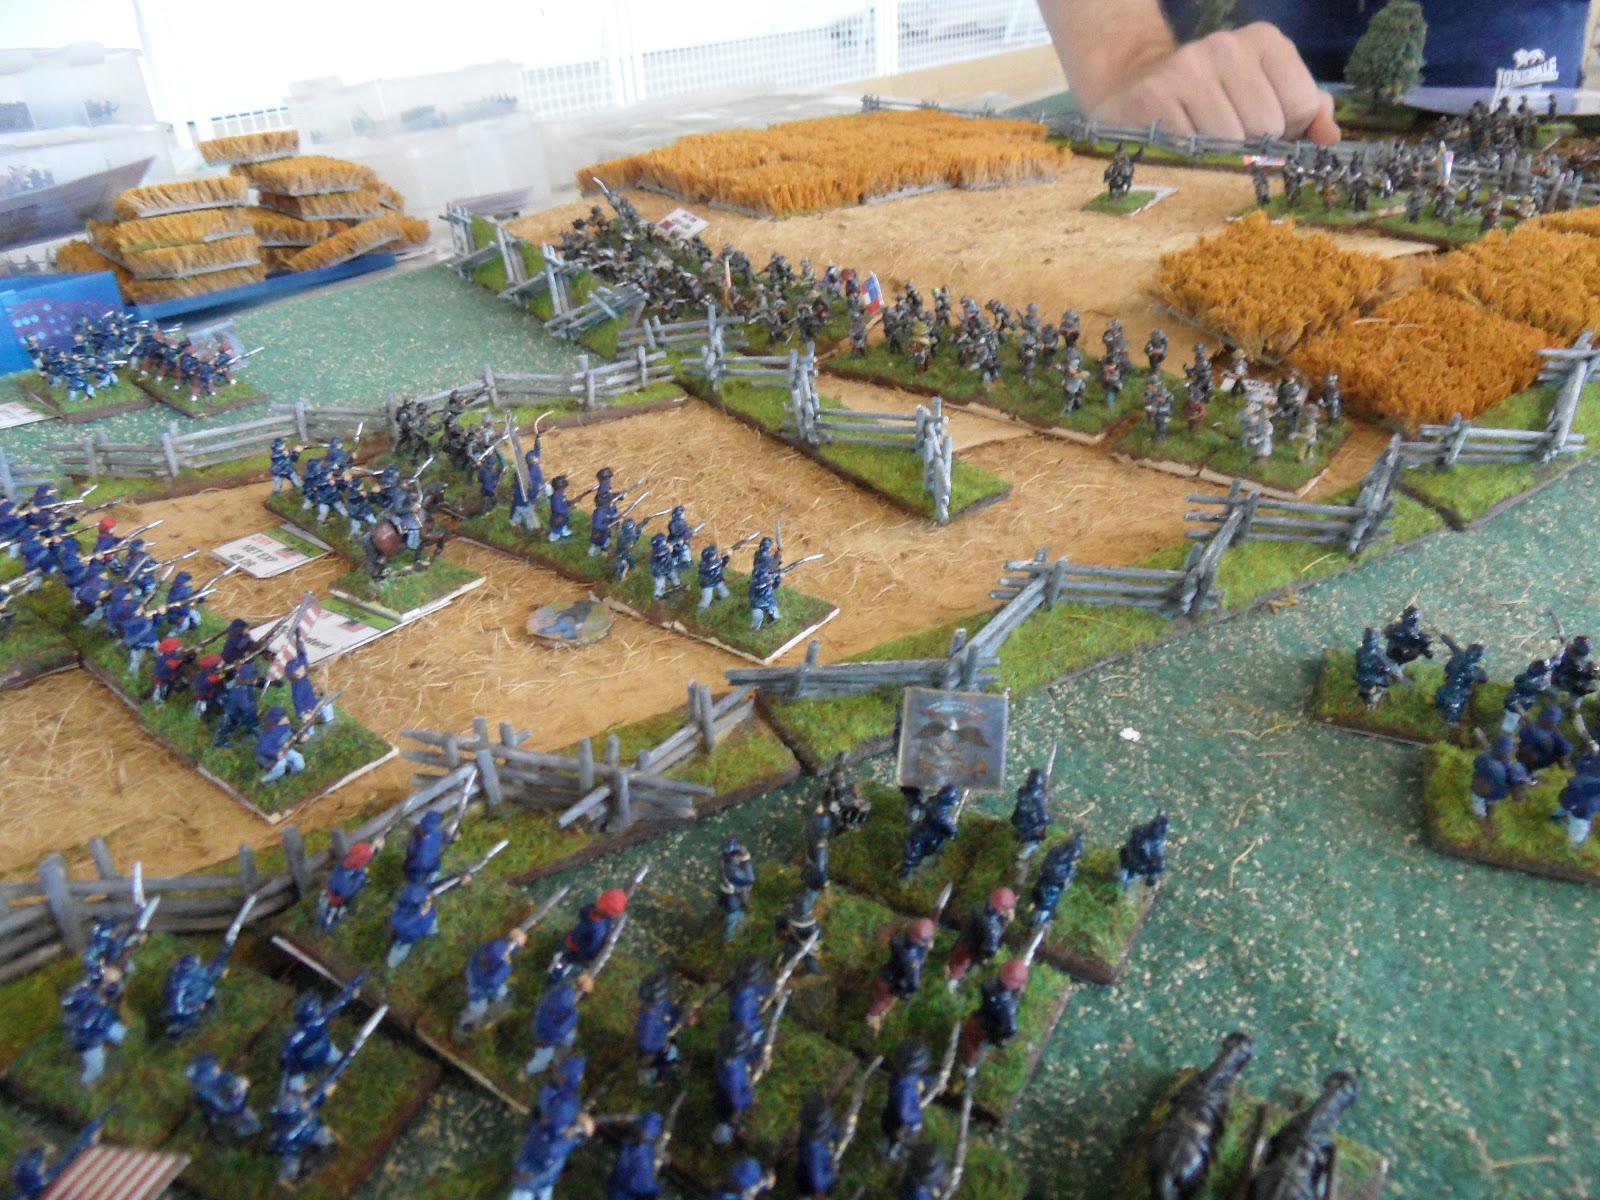
Graham's Northern Brigade advance  in two lines, with the front line entering the woods in Skirmish formation. 


The 40th New York are the first to come under fire in the Union first line near Stoney Hill.


The 1st Division Commander Birney (bottom right) keeps a watchful eye on his Left Flank Brigade Commander, De Troiband, who is rated poor and cautious.


Both Generals  have to make a mad dash back to the Union second line situated on the road next to John Rose's farm as the Rebs manage to break through the Union
 first line.


The  Rebs  push on, and  start to cross the  open terrain by the  side of Stony Hill. The Union second line begins to pour heavy fire on the advancing grey hordes.


On the Union right flank the Union brigade under General Ward are faring better, with the Confederate attack slowing down due to having to traverse rough and marshy ground.


Although taking large casualties the  Confederates attack an Union artillery battery and overun it and penetrate the Union second line. The rebs are in full control of the objective in the centre, Stoney hill. Birney orders Graham to charge the Stoney Hill but they are easily repulsed.


The advancing confederate Infantry have effectively cut the Union positions in two.


The second Union line on the left flank being cut off from the other two brigades begins to rout. With the Confederate troops being well in control of the centre objective the game ended. Therefore the score was now 1 game won each, with the decider played immeadiatley afterwards "Pickets charge".


Tuesday, 11 September 2012

Gettysburg McPherson Ridge


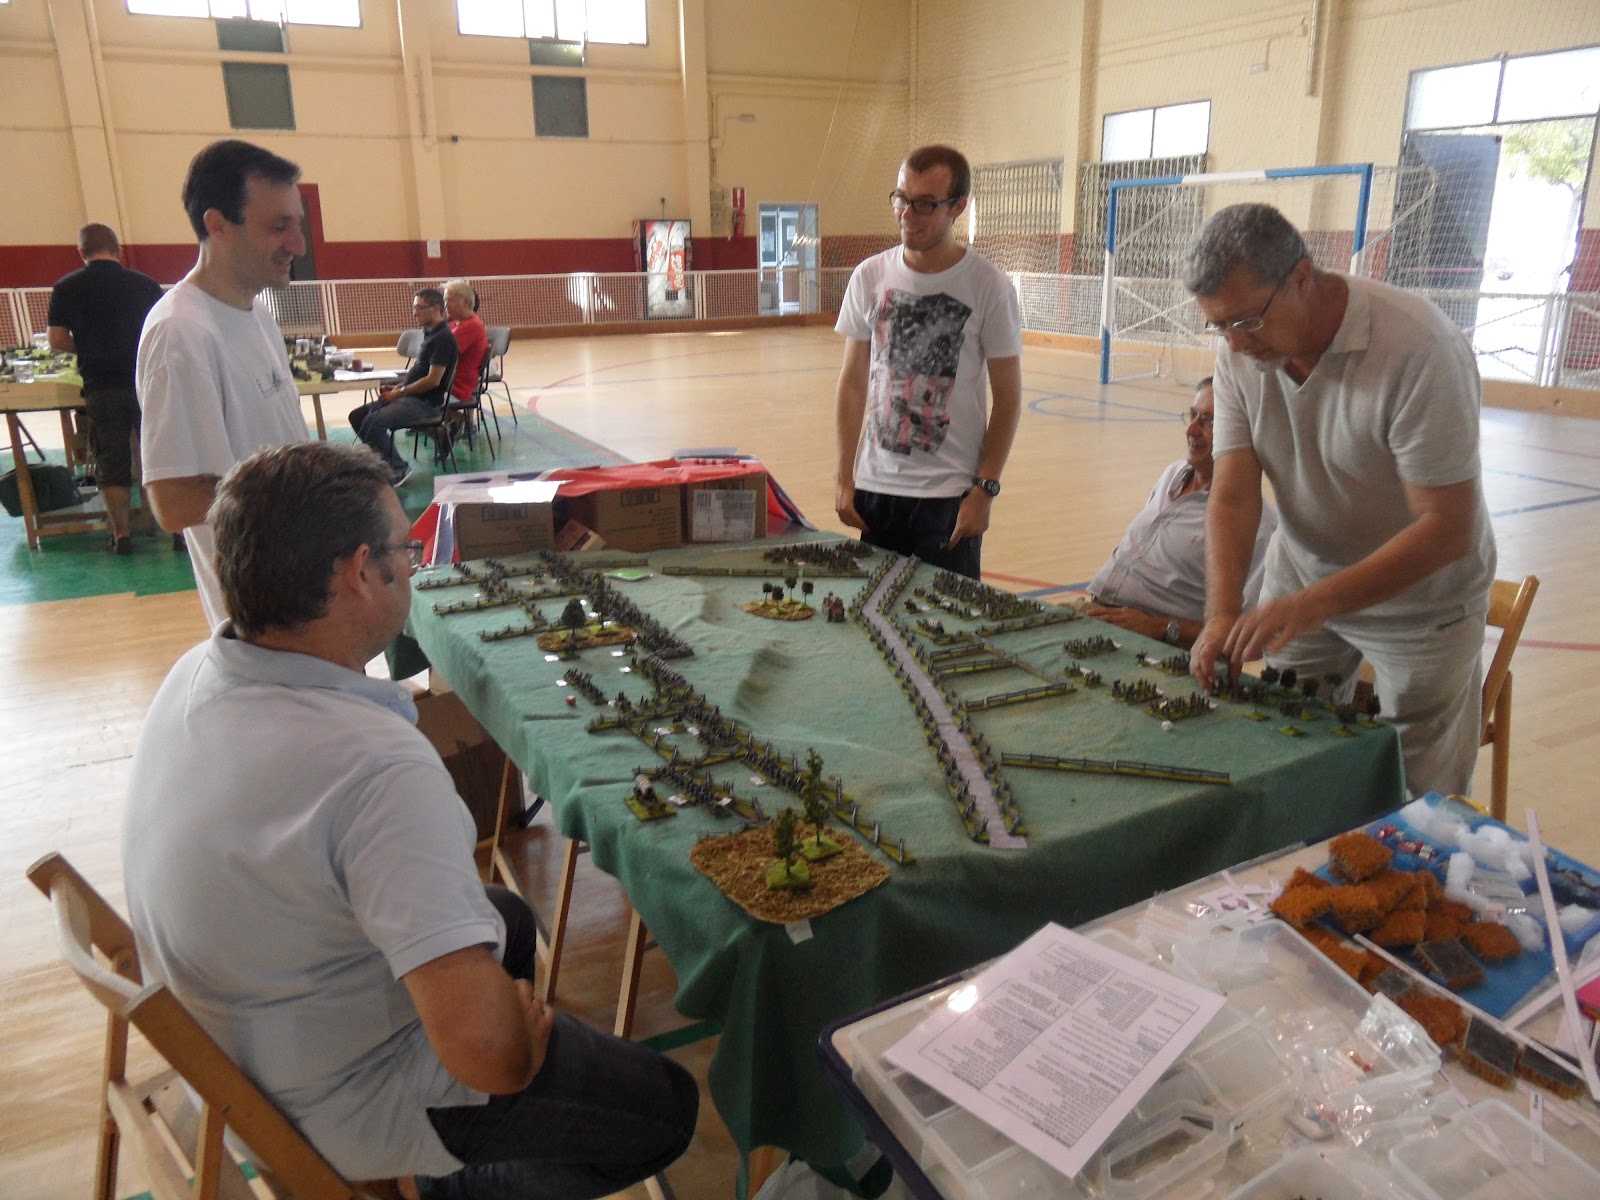
The last six months I have been busy designing a set of rules to play battles from the American Civil War. After a lot of play testing and organising, painting armies and making new scenery ( I seemed to have spent my summer holidays building  fences). I decided that I would showcase the new game at  my local wargaming club convention at San Vincente just outside Alicante. Kiefer my partner in crime was returning to England to start University, but his parents kindly postponed their plans to send him back so we could play all day Saturday. The  rules are designed to play Division level battles, with each player having 3 brigades each, and the basic unit is a Regiment or Battery. 
The first edition of the game is based on the Gettysburg campaign , players can either randomly pick a division to use or play a historical scenario. I decided we would play three games one from each of the three days of the Battle. The first was "McPherson's Ridge."  


The initial setup, I had positioned Gamble's union cavalry brigade to defend the Chambersburg Pike and the unfinshed railroad. Heth sends two brigades in march column directly down these routes, whilst his third brigade, Pettigrew's crack troops attempt to outflank the cavalry on their far left.


Union Cavalry in dismounted skirmish line prepare to be assaulted.


The 8th Illinois take position in a wheatfield just to the right of the cut for the unfinshed railroad.


Pettigrew's Brigade break out from the treeline on the Union's unprotected left flank.


Instead of deploying the Confederate's think they can just sweep the small Union Cavalry brigade
aside. But the Union artillery and Breech loading carbines begin to pour a devastating fire onto the head of the Confederate columns.


Usually at the end of turn 1 reinforcements can not enter, but the commander of the Iron Brigade is aggressive and so gets a +1 modifier. I roll a 1 and so the Iron Brigade arrives ahead of schedule. I place these troops  arriving from Gettysburg along Pike Road. 


Pettigrew's Brigade however is quickly advancing towards the Union left flank unopposed.


At the end of turn two , I roll the dice to see if my final brigade of reinforcements arrive the Commander, Cutler is only competent so does not have a modifier. I need and roll a one again and I place his brigade just in time to rescue my threatened flank.


Both brigades deploy to face each other in the wheatfields.


Pettigrew's brigade of crack troops shout out their famous "Rebel Yell" and charge. Two Union Regiments to my dismay turn tail and run.


However, there is better news in the centre, The Iron Brigade has routed the front of the Confederate brigade, as they run back down the road they spread panic and another two regiments run away as well. Heth is able to rally his troops before they leave the field of battle, but with the Union troops in possession of the ridge the game is finished.

This was a very enjoyable scenario, which could have ended very differently, if I hadn't been very lucky with my reinforcements. Kiefer had made a mistake in not deploying his troops earlier on and paid for it when I managed to easily rout his troops. So after the first game the Union are winning one-nil.  We quickly change the scenery and troop labels to play the second day game "The Wheatfield". I will be posting a report of that game in the next day or so.